The Beginnings of a New Space: Part II
links between upcycling pallets, modularity, and Japanese architecture
If you read the last installment of this series, you will know that we were, in no uncertain terms, pushed to start a new space. In the same week, we found out that we would need to move out of our studio space and our home. What's more, it would all need to happen by January.
We were quick to find a new space, and at the time I had the bright idea to make a floor inside out of upcycled wood shipping pallets in this new space. Given our experience with this, I figured that if we could find a bunch of pallets in time, we could easily fashion them into a floor before we moved.
That is not quite how things turned out.
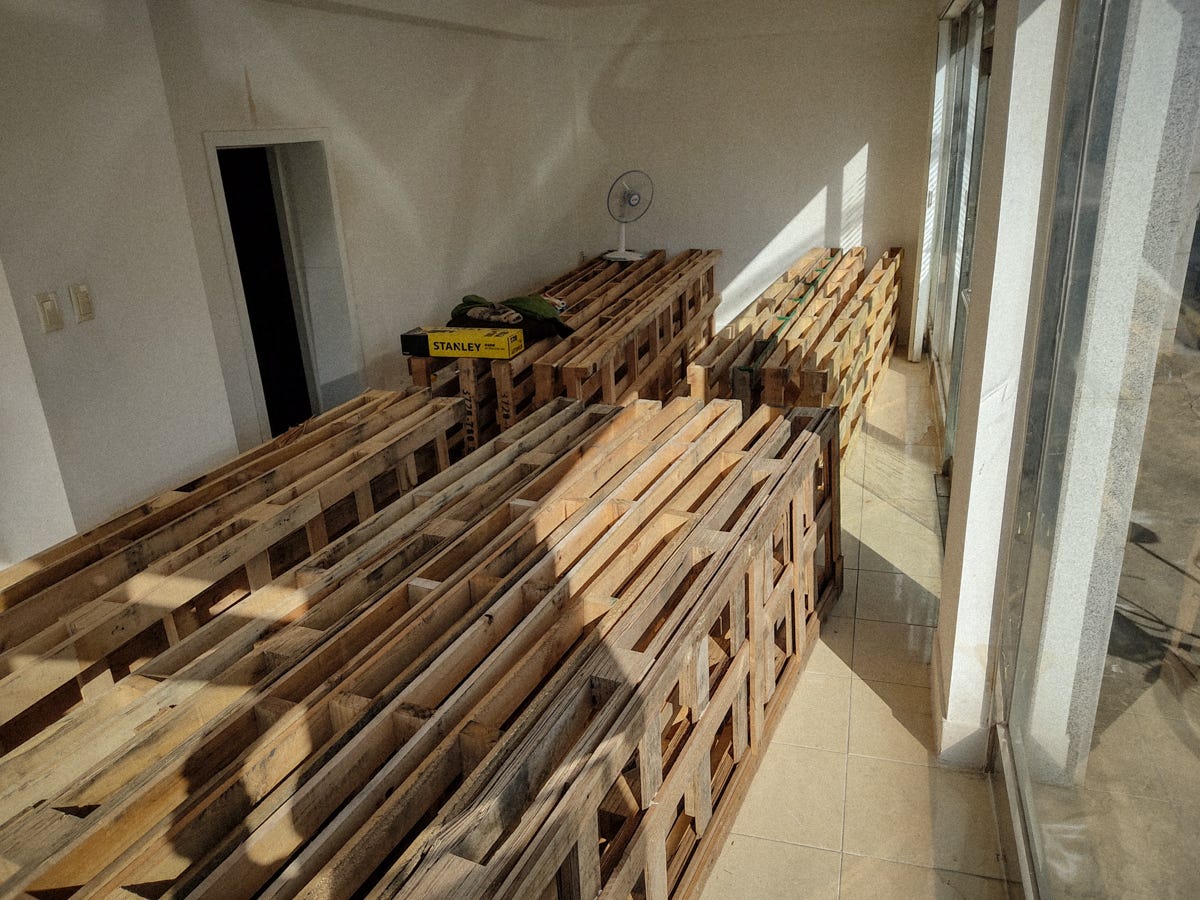
First of all, here is a photo of all the free wood pallets after they arrived in the shop space.
I was progressively sweating as we moved each one down from the truck and through the door, and not just because of the heavy lifting.
You can see here that I clearly had not calculated the space they would require. The pallets took up nearly the whole front shop space, leaving scant room to take them apart, let alone actually build anything with them.
And then Suhee reminded me of an even bigger problem.
In just a few weeks' time, we would need to move out of our current shop and into this one. We not only had to get those pallets pulled apart, but we also had to pack up and move both our house and studio spaces.
Can you picture a bunch of desks, tables, chairs, art supplies, herbal tinctures, and boxes fitting anywhere in the above picture?
What was supposed to be a slow, meditative process of taking apart pallets turned into a race against time. Clearly, I had to abandon the idea of making a floor before the move date, but at least I would need to take the pallets apart. This, because the wood that makes up these pallets can be stacked neatly in a corner once it is pulled apart, giving us most of the floor space back.
Knowing this, I did what any disciple of Tim “The Toolman” Taylor would do.
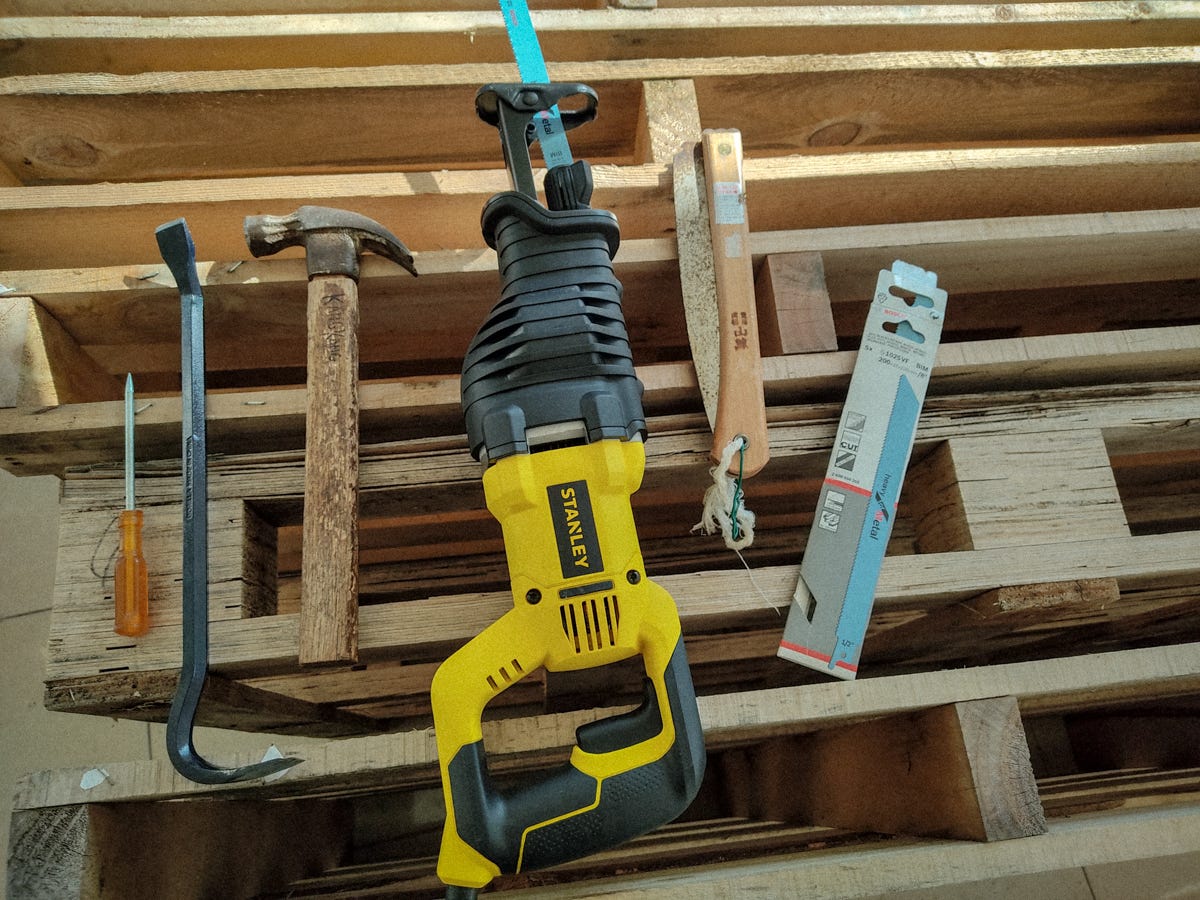
I made a big grunting noise and bought a new tool.
There are plenty of YouTubers building fancy furniture out of old shipping pallets. That is great. It is a fun job. It is a tough job. You need a good grip of equipment to even think about doing it. But we are not building fancy furniture here, nor do we have money or space for a proper wood shop!
If you followed our past remodel work here in Daejeon, or the one before that in Kitakagaya, Osaka, you’ll know that our design-build ethos is along the lines of “just enough.” We save as much throw-away material as possible from the landfill or incinerator, and fashion it into something that is 5 parts utilitarian, and maybe 1 part beauty. Would you call that rustic chic? Maybe heavy on the rustic.
Ah, I can imagine the floors for our new space now, planed nicely on one side. Still a bit rough in some places, but not where it would give you a sliver. Not quite perfectly even, but not so uneven that you would stub your toe.
But before we get to any of that, I hear Suhee’s voice. “Where are we going to put the boxes with all those pallets in the way!?”
Yes. Right. We just need to focus on getting those pallets apart. For that, Suhee took a short video, useful for anyone who might want to embark on some wood pallet upcycling.
HOW TO QUICKLY TAKE APART A SHIPPING PALLET
This video shortly shows the process we are using to pull apart the pallets quickly, with a minimal amount of damage to the wood.
What is going on in the video:
The pallets we were given have two types of wood pieces, long thinner boards, and short thicker braces to which those boards are nailed. They are really nailed, with long, nasty, twisted old nails sunken into the boards. I have tried prying the boards off. It works, but it takes forever, and you usually end up breaking a fair amount of the boards. I’ve also tried cutting the boards off. It is quicker, but then you end up with smaller boards and timbers with pieces of board and nails that still have to be dealt with.
Our approach this time was the quickest so far. Instead of sawing the boards off, we sawed the nails off, allowing the boards to come free unscathed. To do this, we slide a reciprocating saw in between the board and the bracing timber. However, for this to work well, we needed to create a small separation between the two pieces of wood. There needs to be just enough space between the board and supporting timber to slide that metal-cutting blade in. If at all possible, the goal is to cut through metal, not wood. Creating that little gap was done with various sorts of leverage, and a bit of pounding.
One note if you are planning on doing this, is to research a bit on the wood types, and the markings on pallets. Some pallets, especially international ones, are chemically treated and regularly fumigated, and probably not a good idea to use for interior projects. The pallets we used were domestic, used for transporting immitation granite countertops.
With that said, the tools are simple. You can even use a hand saw with a metal cutting blade, rather than a power tool. If you do it right, it’s like slicing through butter. If you don’t get enough separation however, it is slow and very painful.
So although the floor is not done yet, I do have neat stacks of wood waiting to be used, and space enough — just enough — for the influx of boxes while also leaving space to work. Here is the lumber garnered from about 10 long pallets, which I figured is about 30 or so of the normal-sized pallets.
But alas, I have a final secret to share.
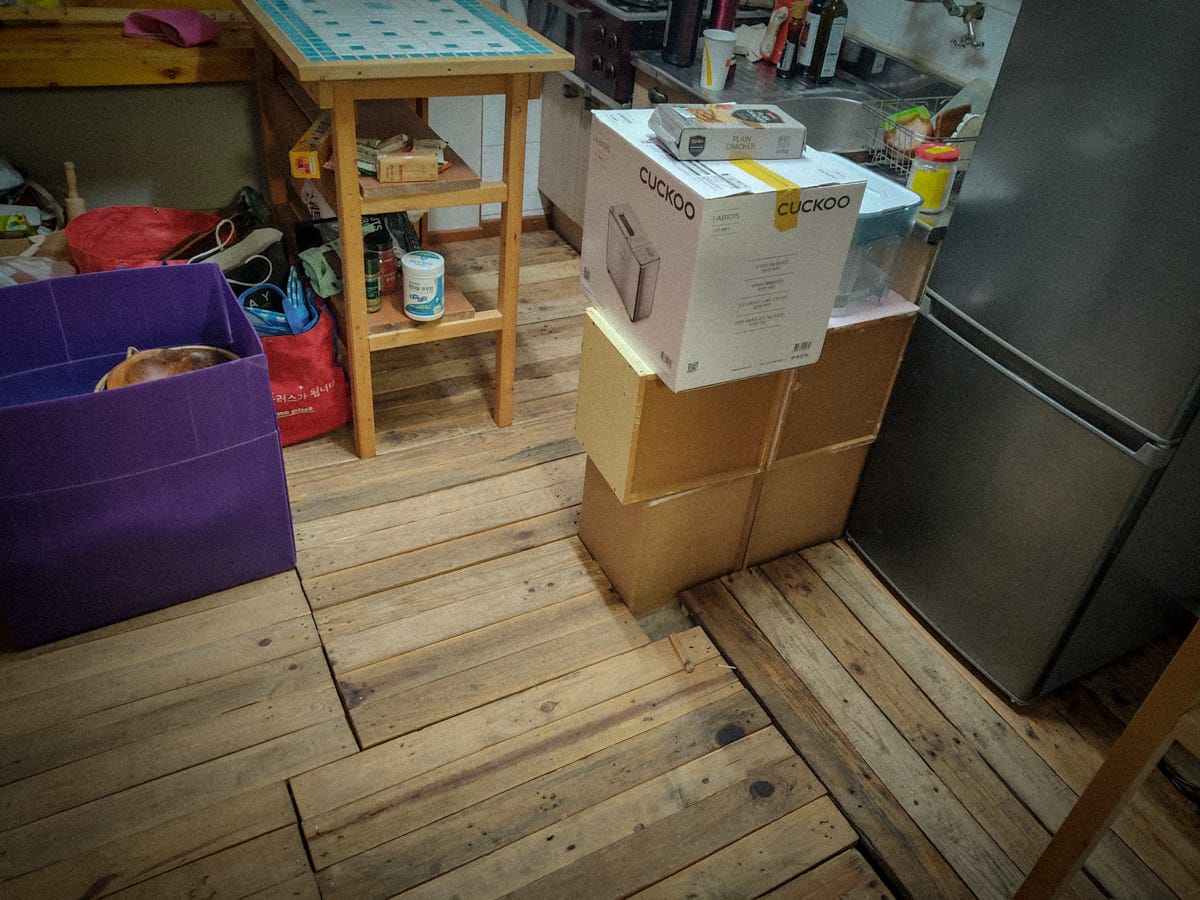
We are already fashioning a wood floor in the kitchen of this new space — and we did it without taking apart any new pallets. Forgive the mess, and the gaps in the wood. An explosion of unpacking is in progress and this is just a rough layout of the floor for now.
This patchwork of wood panels is actually the result of work done last year, while taking apart pallets at our previous shop. Those floor panels used to be part of a small stage and gallery floor in Corner Shop, and we took them with us to this new place.
We also took a wall and all of the wood framed shelves we had built.
Everything built in our previous space was designed to come apart, to be tied into compact bundles of wood, and then to be re-installed somewhere else quicker than whatever you might buy from IKEA — at least, quicker than how I can put together things from IKEA.
Given the introduction to this writing, you might sense why I habitually design things this way. It’s a matter of ecological thinking, certainly. But it’s also simply a matter of surviving as an artist who for various reasons is so often moving from one place to another. It benefits us to design stuff that is movable, reusable, and in its own way, somewhat modular.
But this way of working is reasonable for many other reasons, too.
Which begs a final note for this time…
LIGHTWEIGHT AND MODULAR ARCHITECTURE IN JAPAN
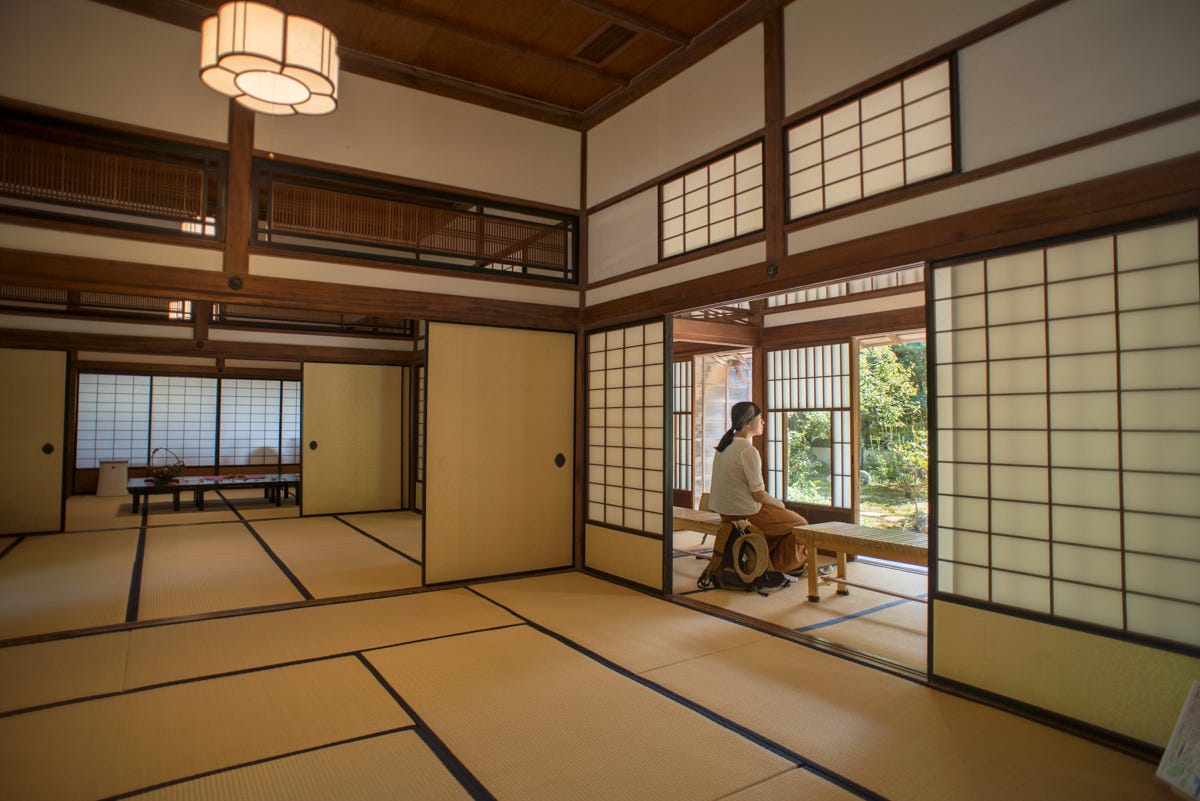
You might say that this process of making modular, easy to move around interiors is somewhat like traditional urban buildings in Japan. For centuries — and still to this day — entire walls have been made of portable fusuma and shoji screens, built to be easily removed and carried.

Notice the entirety of the doors/windows/dividers are made of shoji (semi-transparent) and fusuma (opaque) panels. All are set into recessed wood tracks for sliding open and closed, and all removable at a moment’s notice. Removable also, are the tatami floors, made from common rush.
Although these walls and floors are considerably more beautiful than our rough pallets, urban Japan had similar — yet somewhat more frightening — reasons for making things modular and portable.
It is said that fires broke out so often in Edo — what is now modern day Tokyo — when the alarm went off, people were prepared to wrap up their bedding, take the shoji and fusuma walls off the house, and carry them safely away on their backs. If the house had indeed burnt, the frame and roofing would be rebuilt and the walls and doors — having been saved from the fire — would just be put back into place.
Not that easy, of course. But if you’ve lived in a Japanese house, you might have noticed how easy it is to just lift off doors, walls, and windows. I made good use of that fact when we lived in Osaka. Very utilitarian. Very configurable. Also, very beautiful.
Maybe 1 part utility, 1 part beauty?
Something to aim for.
See you next time. For now, I need to get back to unpacking…


Always good when an unexpected event leads to the purchase of a new toy ;)
Regarding your mention of the modularity of Japanese architecture--I was reading a paper about Meiji-era slums in Tokyo recently, and learned that in the tenements of the day (and also going back to Edo), the structures belonged to the landlords, while the fittings and tatami mats belonged to the tenants. So when slumlords evicted their tenants they would toss it all outside!
This is indeed a lot of work, but you've figured out so much already! Keep warm and safe! 화이팅!!